Apollo III and Solo Node Support

Welcome to your self-sovereign Bitcoin Journey! Below are some important links and guides to getting started. Please read all support information as most issues are solved easily in the guides and links below!

The Apollo III and Solo Node share the same controller, so support overlaps both units and they share the same SD card image as well, which will be posted in the coming weeks after we unify the Apollo III feature set with Solo Node (upgraded kernel, many OS level bug fixes, support for Dual NVMe drive bays and RAID setup/control!

Please note this is a temporary support page, and we are in the process of revamping support to a new knowledge base system!

Setup Guide

Flashing SD Card

FAQ

Quick links:

Apollo III Full Product Guide

SD Image Release Downloads

SD Card Re-Flash Instructions


If you have any additional questions or support issues feel free to send us an email by replying to your order email or using the contact form on this site!

 
solid-v2.jpg

Setup

All Apollo III variants and Solo Node units have a full Linux Controller and SSD Drive built into the unit. It’s a standalone unit you can use as its own Desktop Computer.  

You have two options to setup your unit, over Ethernet or using a Monitor/Mouse

Setting up with a Monitor, KeyBoard, and Mouse

This is the simplest method to setup your unit, and it doubles as a full desktop computer as well! Simply connect an HDMI based monitor to the HDMI port (on the side of your unit) of your Apollo, and plug in a keyboard/mouse to the back USB port.

Make sure your Monitor is powered on and connected before powering up your Apollo. To power up your Apollo plug in the provided power cable to the back power port, and switch on the red power switch. You should see a red glow, and fan should start spinning up to full speed during the boot up process.

The fan will slow down when the device boots, and you should be presented with the Login screen on your HDMI monitor. The Default password to login is “futurebit123”

Follow the onscreen instructions to setup!

Setting up over ethernet

You can use the Apollo and Solo Node over its Web UI without needing a separate Monitor, Keyboard or Mouse. To configure this way you will need your own ethernet cable (not provided) and plug one end of the ethernet cable to the back of the Apollo, and the other end to a spare ethernet port in your home network or back of your Internet router/modem.

After you power on the device it will be accessible over your local network using any other Computer/Laptop/Smartphone that is connected to the same network. To access the Apollo you can try the two links below:

futurebit-apollo-3.local

futurebit-solo-node.local

These usually work on Mac and Linux systems, otherwise you will need to find the local IP address of your device.

You can find the IP address by either using a network ip scanner app like fing or ipscanner. This will list all your local devices, and the Apollo should have a name next it it similar to “FutureBit Apollo 3”. You can also log into your router and go to device list to find it that way. Most modern routers/hubs have easy to use Apps that list all connected devices and their IP addresses.

Once you have this ip address all you need to do is enter it in the web browser of your local computer/smartphone, and the Apollo’s web interface should come up.

Just follow the onscreen instructions to continue setup!

Upgrading OS/Flashing SD Card

The main OS of your FutureBit product resides on the small white Micro SD card on the bottom of your device (not the larger Node SSD drive that is right next to it). This holds the software that runs your system, and you might need to periodically update this OS or reflash the SD card to fix corruption issues that can happen after power outtages/hard shutdowns.

You can find the latest OS releases for your device in the link below:

Apollo OS Releases/SD Card Image Download

A Step by Step Guide to Flash your SD card can be found below if you have not done this before:

How to Flash Your SD Card

Please note our web UI also provides periodic OTA (Over the Air) updates that dont require an SD card reflash, you’ll see a yellow icon wiggle on the top right of the Apollo Web UI when those updates are available.

You can also visit our support thread below for additional community support

FutureBit Apollo Support Forum

 

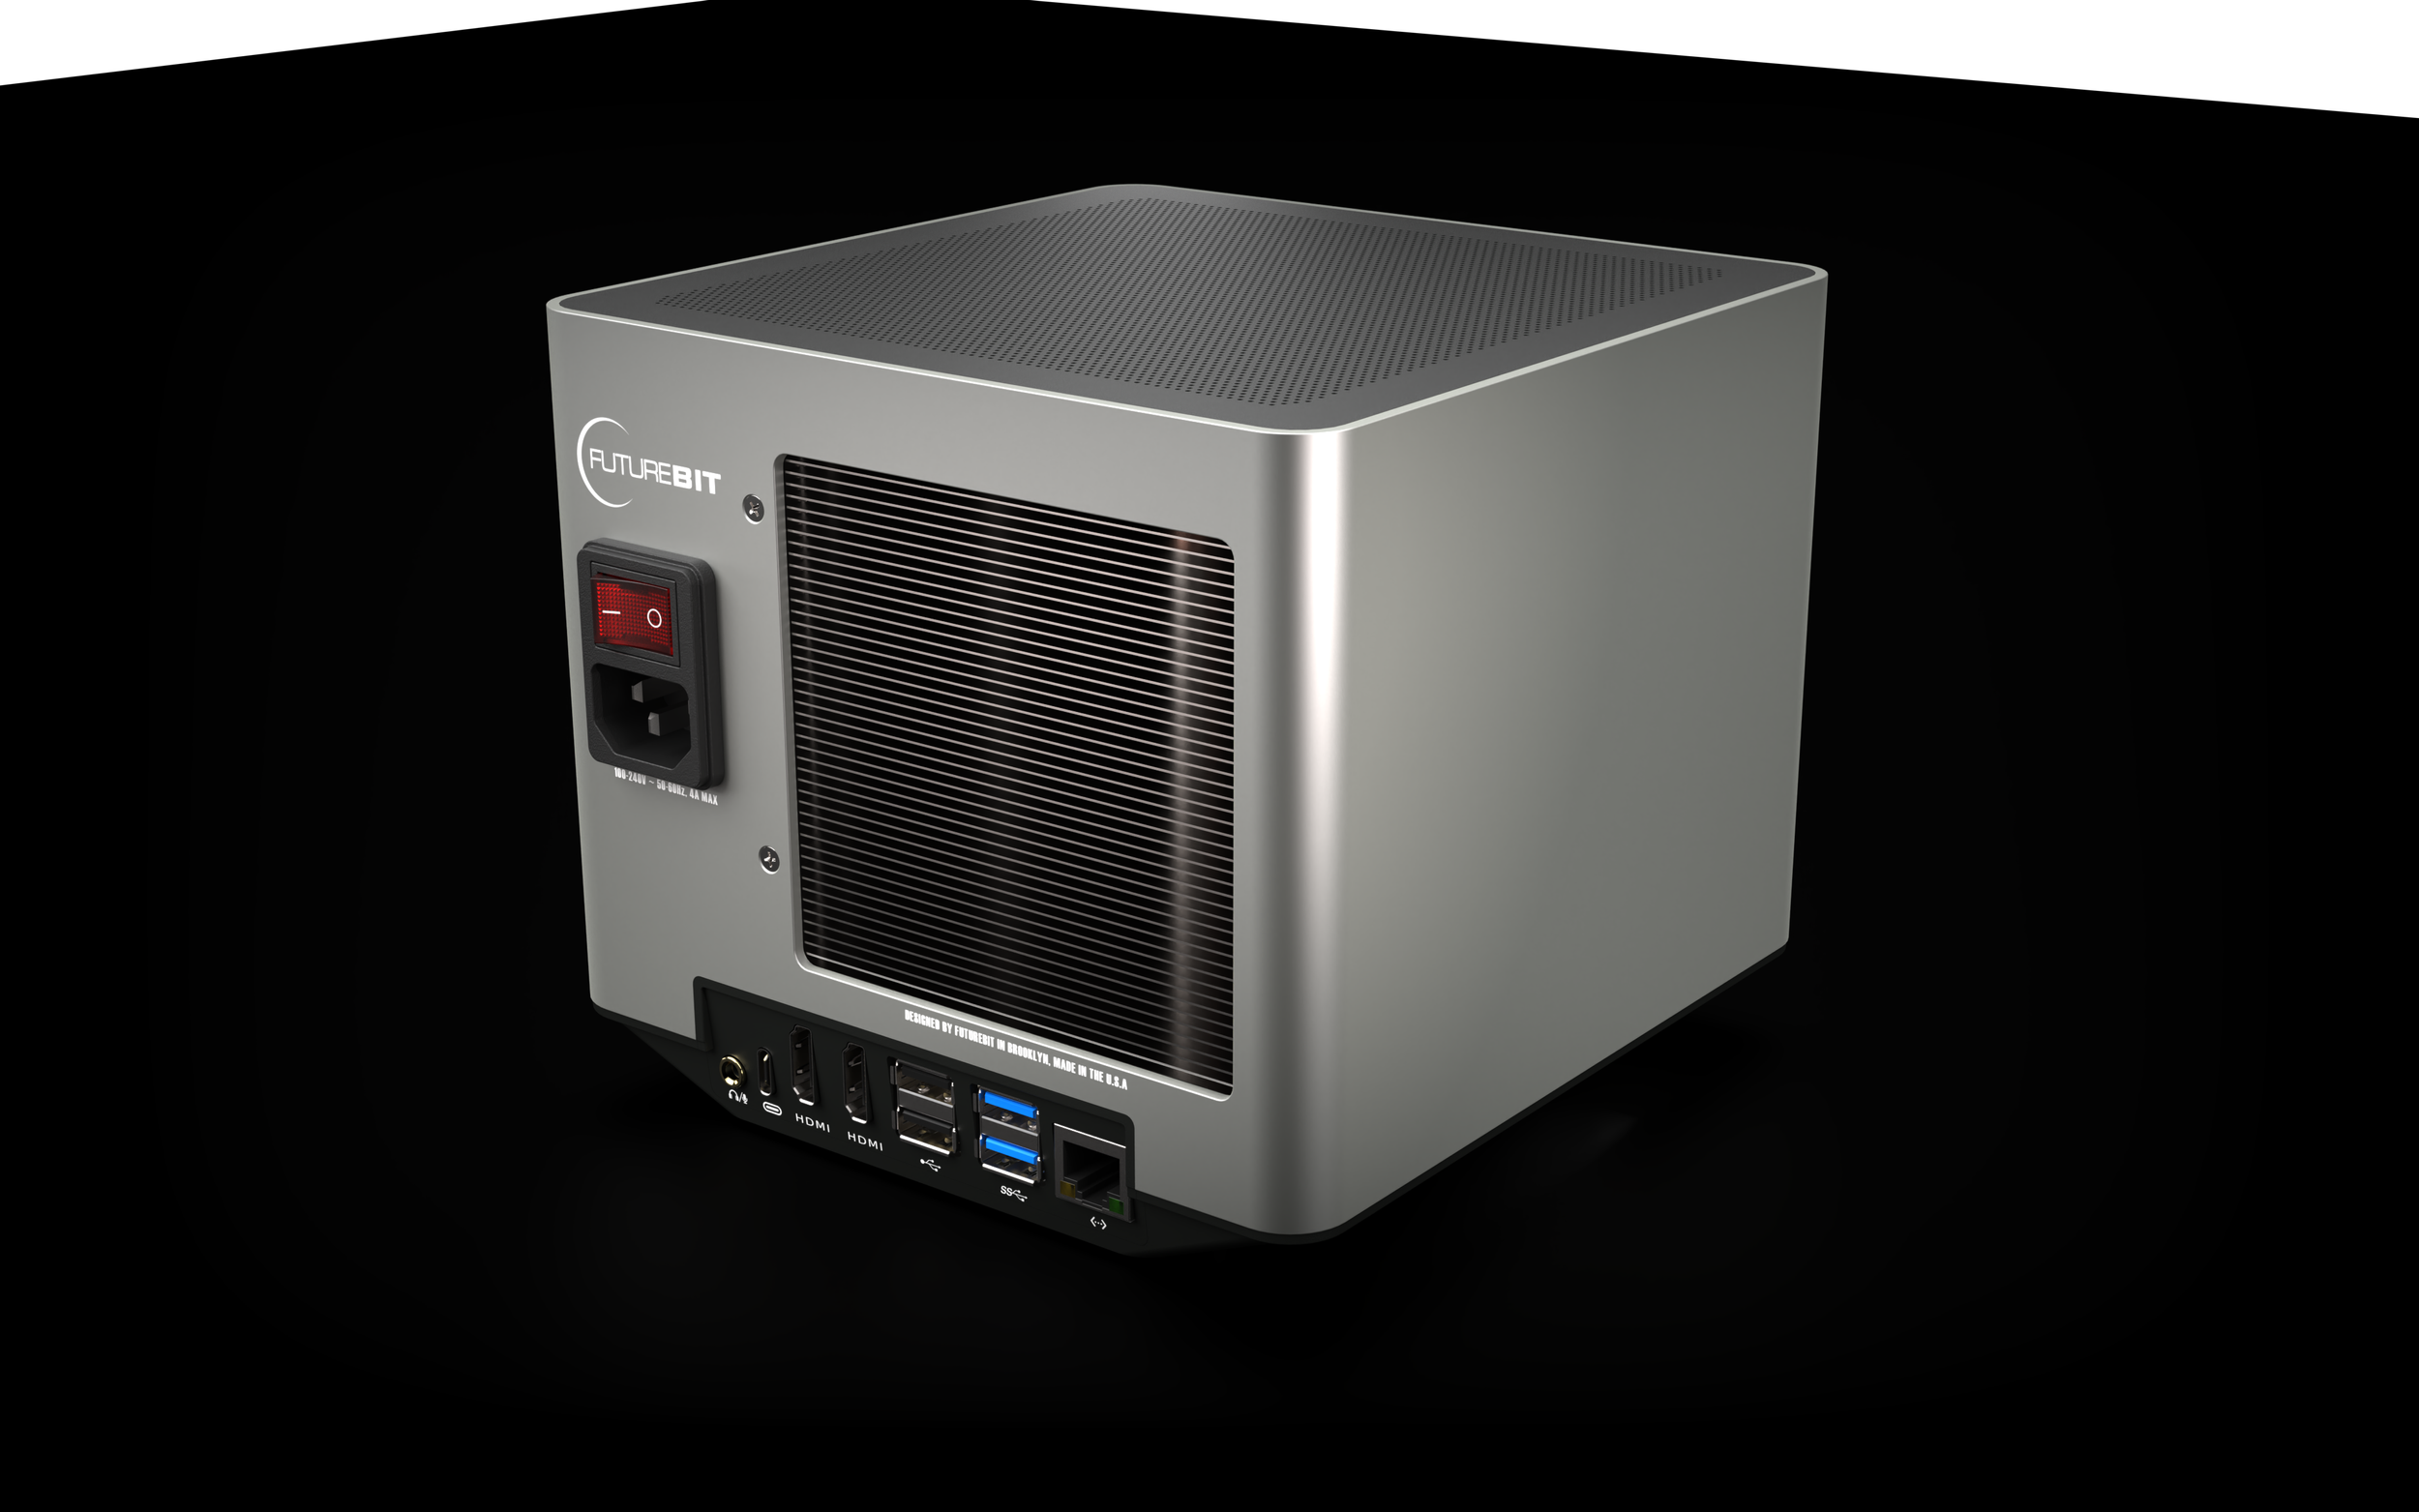
Full Node Unit with Controller USB/Ethernet Ports in the Back

Flashing your SD Card

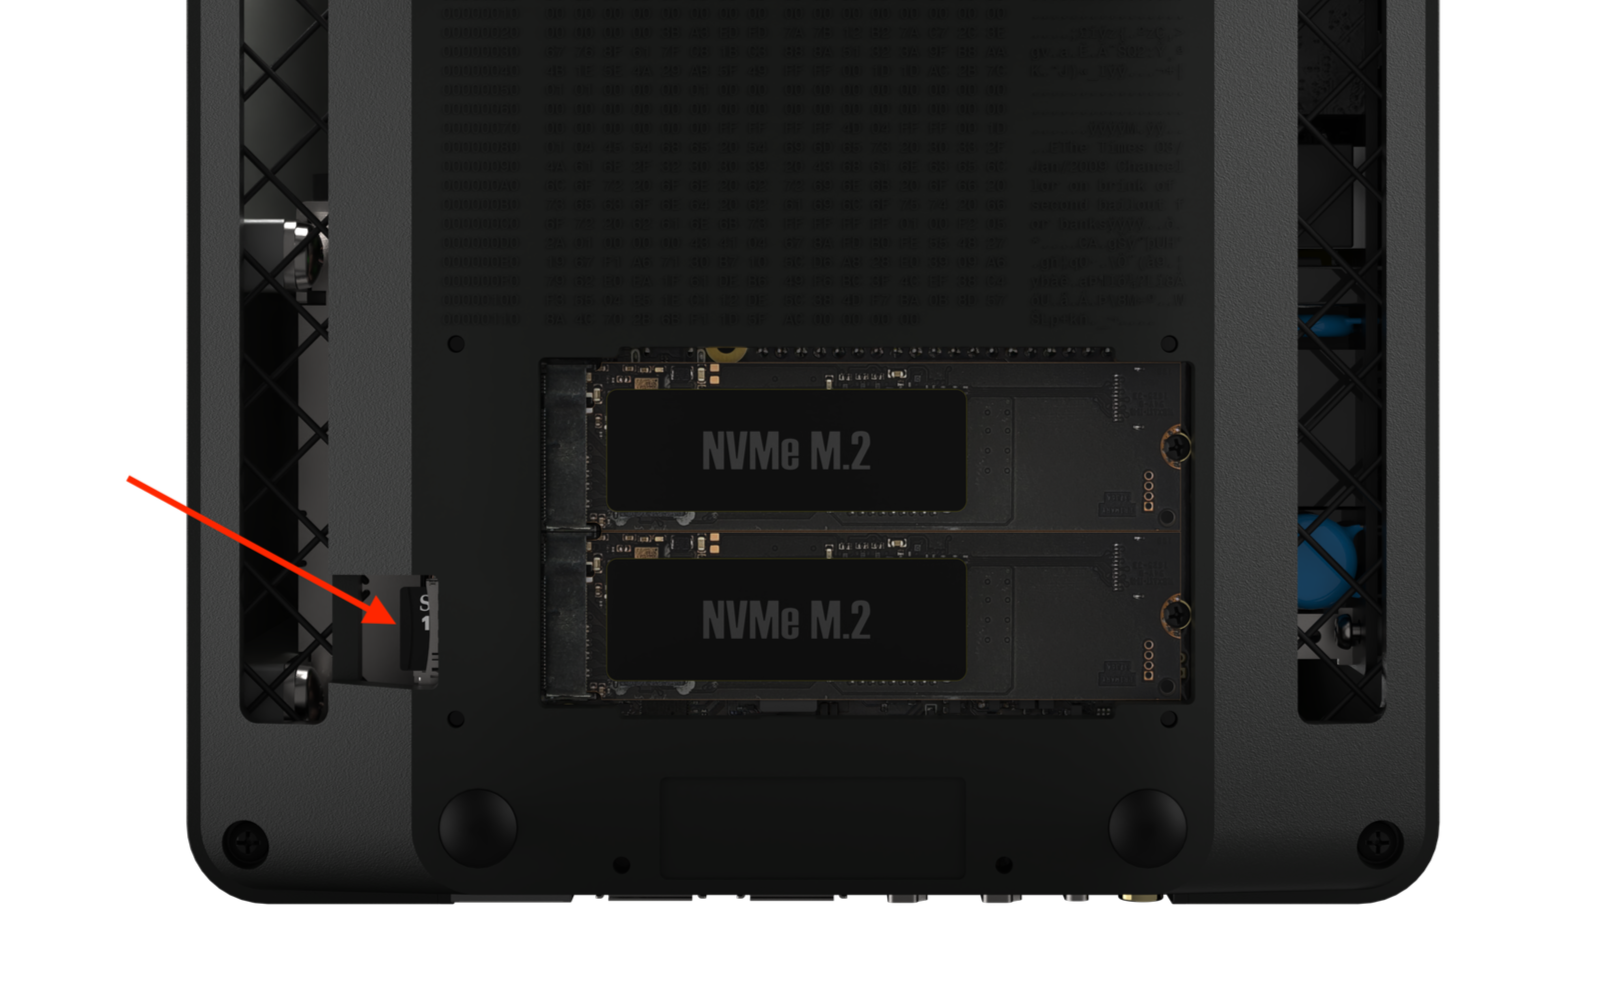
Your Apollo Full Node’s entire OS is run on a small industrial Micro SD card that is located on the bottom of your Device. See image to the left to locate it!

You might need to reflash this card periodically to reset your device to stock state, or fix corruption issues that can occur after power outages or prolonged used. This needs to be performed on a separate computer/laptop.

Please Note: Any data on your Micro SD card will be erased/lost! This includes all files on your desktop/home folder. Make sure you backup any saved files/wallets, or move the files to the SSD drive on your Apollo before flashing

First on a seperate computer system you need to download the latest SD Card Image for your device. This can be found in our image release link below:

Apollo OS Releases/SD Card Image Download

All Apollo III and Solo Node devices use the same image file as they share the same controller. Please note images for the Apollo III have not been posted yet and will be available in the coming weeks.

After you have downloaded the appropriate image file (it can take a while they are nearly 2GB in size) follow the instructions below to flash the image:

  • You can verify its SHA 256 checksum to ensure your download was not corrupted, this step is optional but if you are having issues with flashing you should check this

  • Download the easy to use flash program called etcher that will take care of most of the flash process for you (www.etcher.io) UPDATE: Recent versions of etcher have an issue with compressed files. Decompress the image file first and use the .img file instead of .img.xz file when selecting the image file in etcher. THE FLASH WILL FAIL IF YOU DO NOT DO THIS.

  • Now shutdown your Apollo from the shutdown menu, your Apollo has fully shutdown after the fan starts spinning high, you can safely power off the power switch in the back after this.

  • Remove the white SD card on the bottom of the device. It’s in the open slot next to the SSD drive inside the silver slot on the blue controller. You press in the sd card until you hear or feel a click and it will pop out a little. The space is a little hard to pull it out so we recommend using tweezers to pull it out all the way so it does not acceidgently drop in the case.

  • Insert this SD card into your computer/laptop you downloaded the image/etcher to flash. If your laptop has a slot you can use this, otherwise you might need a USB to microSD card adapter (you can get these for 5-10 USD from amazon).

  • After you have inserted the SD card it might tell you that card is not recognizable, you can ignore this since its formatted for a different OS

  • Launch etcher, and click “Flash from File” to select the downloaded image in the previous step, and for the “Target” select the SD card you just inserted (it will be the 16GB sized card)

  • Press flash and etcher will take care of the rest!

  • Please note etcher should show flash completed successfully but your computer might say drive not recognized.

After you flash the drive wait for etcher to verify it successfully flashed. Your computer might complain about not being able to read the SD Card, ignore this your SD card was still flashed correctly if etcher displays Successful flash. This is normal since its formatted for linux file systems, just ignore and eject the drive, it will be ready to use for your Apollo!

You can now eject it from your computer and re-insert it to the Apollo. Make sure you hear a “click” so it’s properly inserted. You can then power on the Apollo and it should boot to the updated OS. You will need to set up your device again.


SD Card Location for Apollo 3

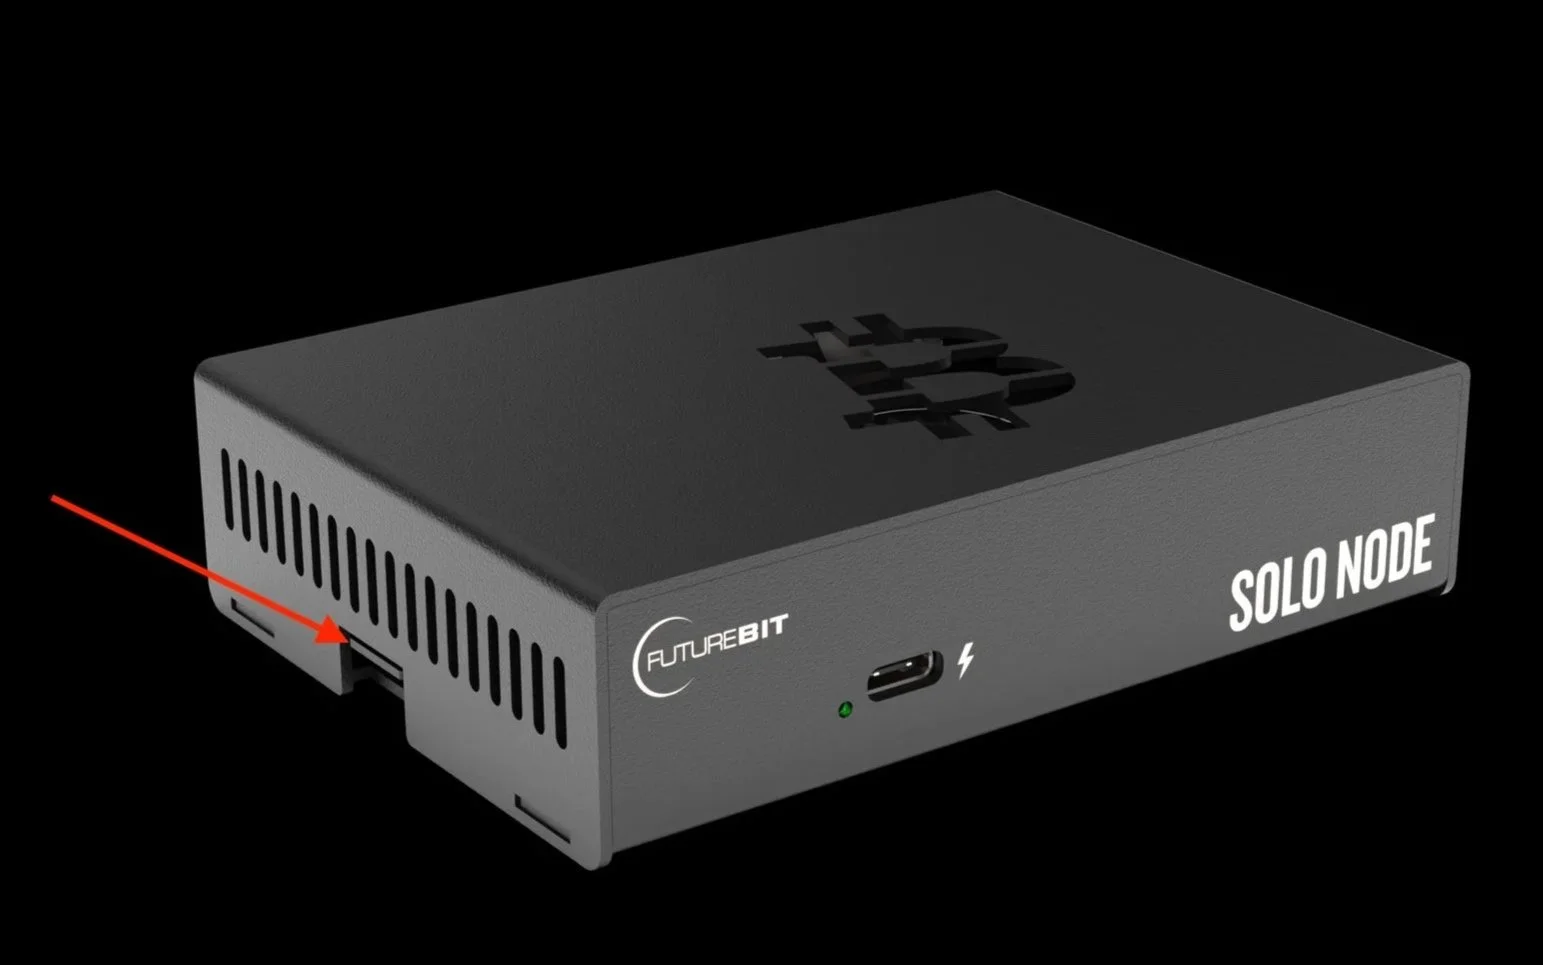
SD Card Location for Solo Node